One frequently asked question by new and aspiring streamers is – should I livestream content or schedule pre-recorded videos?
The short answer is that live streaming is the better option for real-time audience engagement. However, there are certain circumstances where it may be best to schedule pre-recorded videos instead of setting up live broadcasts.
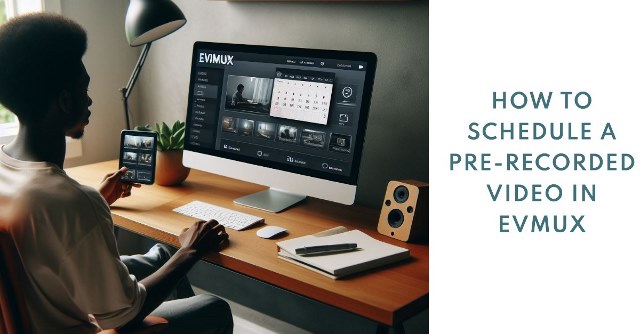
This article shall serve as a definitive guide to video scheduling in EvMux. But first, let’s understand what pre-recorded video scheduling is and how it might benefit your social media campaigns.
What Is Video Scheduling?
Many new Instagram streamers often wonder – how do you go live on Instagram?
The process of going live on Instagram is quite straightforward.
Start by swiping right anywhere on your Instagram Feed, then scroll down the page to locate the “Live” button. Add a title and comment to your streams by tapping “Title” and “Comment,” respectively. You can then embed your Instagram account to EvMux or other reputable streaming software and you’re good to go.
However, since our focus is scheduling videos with EvMux, it’s only fair to start by defining what scheduled videos are.
Now, video scheduling is when you record a video, upload it to a streaming platform, and then set it to be published at a specific date and time.
Most scheduled videos are pre-recorded offline. However, you can stream an event live and save it for later publishing.

What Are The Benefits Of Scheduling Pre-recorded Videos?
Pre-recorded video streaming lets you tap into a wider global audience by allowing them to interact with your content during their most convenient hours. This can benefit creators with high-value followers across multiple time zones.
Scheduling pre-recorded videos is also convenient from a creator’s viewpoint. That’s because you can record your streams when you’re offline and play them on your social media platforms later on.
Pre-recorded videos also tend to have better audio-visual quality than their live-broadcasted counterparts. That’s because you can fine-tune the content for clarity before scheduling it for publishing.
Why Schedule Pre-recorded Videos With EvMux?
While you can schedule your content with most streaming websites, scheduling pre-recorded videos on EvMux lets you unlock the platform’s nifty streaming features. These include a user-friendly drag-and-drop editor and several customization features. For instance, you can discreetly chat with specific participants using a push-to-talk feature without distracting the rest of the team.
You might also consider scheduling recorded videos on EvMux if working on common projects with several collaborators. The EvMux platform lets you partner with up to 12 participants in a single project.
There’s a vast catalog of EvMux effects to add to your videos.
Besides, EvMux is a cloud-based service. That means you can readily access the app in a web browser. No need for download and installation.

How to Schedule Pre-recorded Videos with EvMux
- Sign in to your EvMux account.
If you don’t have an account yet, you can register for one here.
- Select “Sessions” from the upper left corner of your EvMux dashboard, just above “Settings.”
- Choose the session that you wish to schedule your pre-recorded videos.
Alternatively, you can select a new session. The EvMux pre-recorded content management platform will prompt you to set your preferred title and description in the relevant fields, followed by the start date, start time, and end time.
- Click save to proceed to the Live Editor page.
- Check the upper left corner of your EvMux dashboard to ensure you’re at the Pro Scene section.
This is where you can add your pre-recordings and implement a range of effects.
- On the Pro Scene page, scroll down and click “Add Scene,” followed by “Empty scene (default).”
- Hit the “Create” button and wait for the page to load.
- Click “Add New Layer” and then scroll down to “Media Files.”
- Select “Upload New” and browse your device’s library for the video you’d like to pre-schedule.
- Press “Open” to upload the video to EvMux.
Do not close your session until the video is 100% uploaded.
- Click the video and add it to your pre-selected scene.
- Click on the ‘clock’ icon and select “Stretch to Canvas.”
This will prompt your EvMux video content scheduler to make the video full-screen for a better experience when you publish it.
- Click on the ‘star’ icon to the right of the ‘clock’ icon and choose whether to ‘Loop’ or ‘Autoswitch’ the video.
Looping allows your video to play repeatedly, while Autoswitching will have the video play once, and then you can switch over to your pre-created scenes.
Note that despite the name, the Autoswitch doesn’t function automatically in the editor until you hit “Go Live.” So, don’t fret if you’re unable to preview your scheduled video at this point.
- Head to “Broadcast Channels” to determine where you’d want to publish the video recording.
Although EvMux currently lacks GoPro live stream capabilities, it’s great to know that you can publish your video recordings on Facebook Live, YouTube, LinkedIn, and Twitch.
- Check the blue icon that appears to add a title and description to your videos.
- Set your preferred privacy requirements and click “Schedule for later.”
- Choose a thumbnail, set the date and time, and hit “Save & Publish.”

Wrap Up
There goes our beginner’s guide to the EvMux video broadcasting schedule. Be sure to follow this procedure diligently if you’re keen on tapping into your online audience with pre-recorded videos.
Create Your Free Account Today and Give Evmux a Try Now! – https://create.evmux.com/Evmux